Saturday, August 31, 2019

Sunflower Thanks

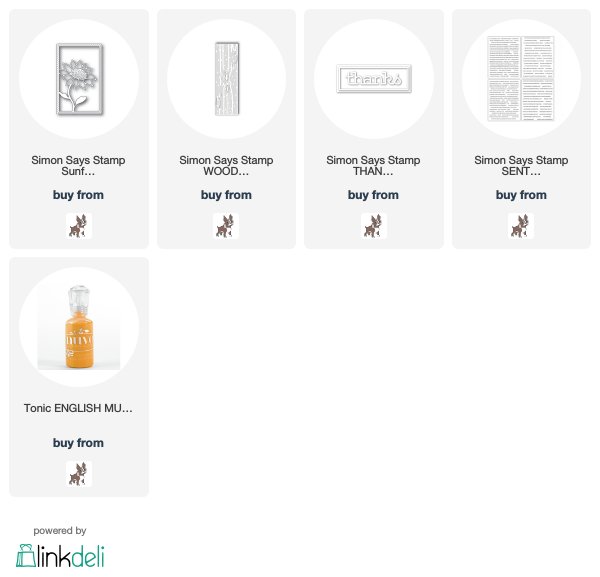
I made a couple cards using the Simon Says Stamp Sunflower Frame die, from the Believe in You release... 
This first one, I used paint chips in two shades of yellow to fill in the flower petals.  So funny, when I was looking through my paint chips, I found the most perfect color for my die (look at the last color:)!!)...
I layered the flower die cut, and put tombow adhesive on the bottom one with all the petal pieces still intact.  I then die cut the Simon Woodgrain Block and layered. I adhered the flower frame to the block, added some Tonic drops, and adhered to some old Stampin'Up striped paper, with a layered, die cut "thanks" sentiment.  Here's a close up...
The second one, I am just so in love with yellow and black and white polka dots.  I used this same idea on a card I made at the beginning of August...ending the month with another just like it:):):)!!   What can I say, yellow, black and white just really "go together"!!   I colored the bottom layer of still intact petals with my Prismacolor markers , and then adhered layers over the colored petals...
I used a Simon sentiment strip and popped up over a piece of black and white polka dotted paper.  Here's a close up...
Can't wait for tomorrow...September 1st...the start of STAMPtember® at Simon Says Stamp...a month long celebration of all things stamping and card making!!  Hope you will join in the fun...check out the Simon Blog all month for the AMAZING Simon release, as well as other releases and SO...MUCH...FUN!!!!  
Thanks for visiting me today!! Hugs!! Lisa

Wednesday, August 28, 2019

Stencil With Embossing Paste and Ink


I used the Gina K Designs Thick Brush stencil and Stamp Market Few Words stamps/dies to make a couple cards to share with you:)!!...
I useds my distress inks sponged over the entire stencil/card panel.  I let inks dry, then placed the stencil back over the dried rainbow of inks.  I used Translucent Embossing Paste over the entire stencil.  I let the paste dry, then I cut two strips from the panel, and made both cards with The Stamp Market sentiments, the first with the"thinking of you" sentiment.  Here's a close up...
The second, just like the first, except with the "thank you" sentiment ...
Here's a close up of the shine of the paste with the ink!  I also used Tonic Jewel drops to give the panels a little bling...
Such fun!!  Hope you're having a great week with some fun, too!!
Thanks for visiting me today!! Hugs!! Lisa

Friday, August 23, 2019

Scallop Waves Made Rainbows

I made a couple cards using the new Simon Says Stamp Scallop Waves background stamp, from their latest release Believe in You!  I know this is a "wave" stamp, but I only see rainbows when I look at this cool stamp...so I used it to make two cards with rainbows...
 These cards were simply done, stamping, clear embossing, then coloring the 6x6 stamped waves/rainbows with my Sharpie/Mark It markers.  I tested the colors before I colored, to not only get the "right" colors, but to also get just the "right" shades of each color in the "right" place.  I colored most of the 6x6 stamp, then cut a couple strips for these two cards.  I recessed the first one, popping up the white panels above and below the rainbows.  I added a sentiment from the new Simon Greetings Mix 1.  Here's a close up...
 The second one, I shortened and layered the strip,  and adhered it across the lengthwise section of the short side of an A2 card with a sentiment from an older Simon set, Jumbo Stripes...
What is so cool, is that you can color one large stamped image and use it for multiple cards!  Here's a close up of the second card...
Okay, LOVE the rainbows...they make me sooooo happy, and the coloring was so much fun!!!
Thanks for visiting me today!! Hugs!! Lisa

Thursday, August 22, 2019

Coloring Vellum...Both Sides of a Butterfly

Every time I look out my kitchen window to the backyard and see a butterfly, I feel such happiness!  Butterflies (and rainbows) make my heart happy!  Do butterflies make you happy?  I have a card to share with you today made with Simon Says Stamp's Comfort and Prayers stamp/die set...
I really wanted to make a butterfly that "looked" like a Swallowtail...one of my favorite backyard butterflies.  I have seen yellow ones and blue ones, so I chose the blue color.  THEN, came the challenge.  Swallowtails are basically black with spots of bright color.  I tried black card stock and colored pencils...nope.  Then I had the thought to use vellum.  Stamping with black on vellum is not so cool, either.  I totally forgot I HAD black embossing powder.  I had gotten rid of the black years ago, and forgot I had purchased more, sometime not so long ago!!  It is Simon brand and is fine powder...PERFECT with versamark on vellum!!!  I normally color on vellum from the back of the stamped/embossed image.  That worked great for the blue color, but the black colored from the back with a black marker, looked gray from the front.  Bummer.  Then I thought....what if I color the black marker on the front of the vellum??  Only thing was, it gave the butterfly a shine I wasn't crazy about.  SO...to make the shine "okay", I used my Wink of Stella brush, to give my butterfly some glittery shine...HAPPINESS!!    THEN, there was the layout.  I know my sole, single butterfly, without anything else but a sentiment, is simple. I tried leaves of all kinds and colors...nope.  The more I looked at him, though, the more I liked the butterfly to be the only thing you see.  No enamel dots, or tonic drops, or sequins...just him.  I thought the sentiment from the Simon Spiritual Sentiments stamp set was beautiful and perfect!  I added some of my recycled paper for the top and bottom of the card...it just "fit" this card.  Here's a close up...
Cardmaking...sometimes it requires experimenting...it's fun!!!
Thanks for visiting me today!! Hugs!! Lisa

Monday, August 19, 2019

Encourage a Teacher

My children are grown, but having been a homeschool teacher to all three of them, and then almost a teacher in the public school system until life suddenly changed direction, I know how nice it would be to receive cards of encouragement.  I substitute taught for 10 years (until last year), and left cards for the teachers I would sub for.  Teaching is one of the most important and yet underappreciated jobs there is.   If you have school aged children, think of encouraging their teachers this coming school year!
I used the new Simon Says Stamp School Days stamp set from the Believe in You release, to make a couple simply designed cards...one to thank and one to encourage some amazing teacher ...
I used my MISTI to stamp the elements of this card...precision and repetitive placement was made easy using it!  I stamped the sentiment, clear embossed, and then stamped the lines over the sentiment.  Then, I moved the card stock up and down, to stamp the lines above and below the sentiment.  I added the apples to the top, colored, then coated the apples with glossy accents to give the apples some "shine".  Here's a close up...
The second one, I used the ruler from the set, along with a sentiment that went with it, to make a card of encouragement (you could even send this to a friend who is a teacher!)...
I used a wood veneer to stamp the ruler on, then clear embossed.  I used the same ruler, and randomly stamped the ruler all around the card stock panel.  I stamped and clear embossed the sentiment, and adhered the layered ruler next to the sentiment.  Simply done.  Here's a close up...
This set is so sweet, and so cool...not to mention lots of fun!!
Thanks for visiting me today!! Hugs!! Lisa

Simple Makeover of Two Cards

This is a repost after my first post of these cards somehow "disappeared"...so sorry for the inconvenience to all those who linked the former post or you found no cards when you went to the post!!  I hope this one sticks around!
Did you ever have cards that you never REALLY love after you make them??  When I have cards that I just don't much care for, sometimes I take pictures of them(thinking I may like them better someday) and sometimes I don't (I KNOW I will NOT like them better someday).  I had two such cards that I made over a year ago that fit the later.  Being that I had not taken pictures of them, I only have the picture that I thought to take, as my cards were on the "chopping block" of my desk with the gray one already having been sliced by my scissors...
I didn't have any sentiments on them originally, and I just never loved the cards.  What I do LOVE, is  how wonderful this craft is, that you can, if you're careful, and somewhat crafty, can sometimes take the pieces off a card, and use them to make another.  SO...I took the flowers, stems and leaves off of both cards and used them to put on NEW cards!  OH...I almost forgot...these flowers were made with a snowflake die...yes, you heard right...a snowflake die from Poppy Stamps Boho Snowflake die set...FUN, right??!!  Here's the white daisy, redone...  
These stamped/die cut sentiments by The Stamp Market are AMAZING!!  I had never seen them until I was in Buffalo helping to clean out my parent's home, and went to Buffalo Stamps and Stuff!  Can I just say...if you are a crafter in the Buffalo, Western NY area, you HAVE to get to this store...it is a cardmaker's dream, a WONDERFUL store with such an AWESOME selection of so many companies' products, and Sharon Klima was SO kind and helpful,  I could have spent DAYS there!!  I so wished I had had more time and days to come back!!  You will NOT be disappointed with a visit to this store...I only wish I didn't live 700 miles away!!  These sentiment stamp/dies are sooooo cool...the intricacy of these dies, really make it "look" like die cut sentiments, not just die cut stamped sentiments...LOVE them!! I stamped them with my MISTI so I could make sure they were really dark everywhere before putting embossing powder on the stamped sentiment.   Here's a close up...
The second was like the first, but with three flowers and a different sentiment...
I DID redo the stems on this card, making them longer.  The sentiments are layered on both cards, and the background is made with a retired Papertrey Ink Impression Plate, Simple Stripes.  Here's a close up...
Don't be afraid to take a chance and redo a card you may not love, and make it into something that makes you happy...and you love, like these do for me:)!!  Simply done fun!!

Thanks for visiting me today!! Hugs!! Lisa

Thursday, August 15, 2019

Love You with Hearts and Rainbows

I made a card today, using the Sunny Studio Window Trio Circle Snippets die...
I had made a card almost a week ago using the Sunny Studio pastel paper for a butterfly's background.  Well, the first one I made, was not wide enough, I had cut the strips too small, so I repurposed it on today's card.  I LOVE Sunny Studio paper packs!  They have the market on  rainbow papers...TWELVE colors in the Dots and Stripes Pastel pack that was used on this card!  I had recently ordered some paper packs from them, and saw this die with the hearts in the centers...I couldn't resist!!  I layered a couple time from underneath, layered the different sized hearts and embossed the top panel with an old Papertrey Ink Impression Plate.  The sentiment is from CZ Design!  Here's a close up...
I'm having so much fun in my craft room!!
Thanks for visiting me today!! Hugs!! Lisa

Wednesday, August 14, 2019

Daisies, a Die and Colored Pencils

I've created a couple cards using the Simon Says Stamp Daisy Bouquet stamp/die set, available together in the Believe in You release!  The stamps came out by themselves, then the dies, the Believe in You release is making them available as a stamp/die set...NICE:)!!  I had made a card with this stamp set back in May, but with the coordinating dies and a couple other Simon products,  I'd like to think that the card from May has been taken to another level... 
Here is the card I made in May...
Today's cards use a darker gray for stamping/die cutting, and I used the same dark gray with the Simon Round and Round Background stamp, for a "light and kind of airy" background, stamped in black.  I think layering the flowers and having a background along with a darker cardstock "take these daisies to a whole new level"...loving this daisy stamp even more than the first card I made with these beautiful flowers!!   I layered the daisies after coloring and added a sentiment from an older but much loved set of Simon sentiments, Bouquet of Thanks.  Here's a close up...
Then, I decided to try this stamp/die combo as a true daisy...a white flower with a yellow center...still coloring with colored pencils...
 
 I DID use my sharpie markers to color the centers...pencils don't color well over embossed surfaces.    I colored with a white pencil and went over in spots, with a darker gray towards the centers.  I used another sentiment from the same set as the first.  Here's a close up of the flowers...
One important tip when coloring with pencils in small spaces like these flower petals, keep your pencil sharpened...all...the...time!!  Makes a big difference and so much easier to color the image!  Coloring is such fun...and I especially love coloring with my pencils!!
Thanks for visiting me today!! Hugs!! Lisa

Tuesday, August 13, 2019

Birthday Candles

I've made a couple cards to share with you today, made with the sweet new CZ Design, Birthday Sweets, from Simon Says Stamp's latest release, Believe in You.  I used the candle and sentiment stamps and their dies from the set for both cards...
For the first card, I stamped the candles with black ink and clear embossed.  I colored them, then layered them, and adhered them above a stamped and embossed sentiment.  I used a glitter gel pen to color the flames (Jelly Roll Clear Star pen).   I used a Simon stitched square die to enclose them in,  and here's a close up...
The second one, I embossed with white powder and used the same gel pen for the flames...
This one, though, I used the Simon Round and Round Background stamp and a thought (and some input from my daughter...thanks honey!).  I had stamped the background stamp in light gray, then black and made the aperture for the candles a square.  Her idea was to use a glitter gold to match the flames of the candles.  Funny thing, my daughter is the one who had given me some glitter gold embossing powder, which is the ONLY glitter embossing powder I have!  I also opted to gold emboss the black cardstock that would be peeking out from the white(I hand cut the circle from the white panel),  and line up the circles.  Love the shine and yet glittery look this powder gives to the lines!  Here's a close up... 
The first card, a no brainer, the second a bit of trial and error, and although they both have six candles, the cards are both pretty different from each other.  Either way, SO MUCH FUN!!!
Thanks for visiting me today!! Hugs!! Lisa

Sunday, August 11, 2019

Gloss and Glitter

I made a couple more cards with the Gina K Designs, Petals and Wings...I am loving this set of stamps, dies and stencil!...
I had an idea for the stems with little berries on them for both cards.  For this first card, I learned, by trial and error, to stamp and die cut the stem first, by itself.  THEN, I stamped the berries onto the already die cut stems, with Gina K Wild Lilac dye.  I found it next to impossible to stamp both the stems and berries and get them to fit into the die when I die cut...just too much room for error. YOU may be more precise, but in case you are like me, remember that tip...will save you time and paper.  I layered the berries, then covered each of the berries with Glossy Accents.  Thought I would show you the difference between the original color of ink and what it looked like after the glossy accents....
...quite a change in color, right?!!  It just so happened I had ONE card size piece of card stock that matched that purple color precisely...so stinking cool, right?!  I used a stencil from Honey Bee,  Polka Dot background stencil, to add some polka dots to go with the berries. I stamped one of the sentiments from the set, and popped up the white off the polka dotted panel.  Here's a close up...
The second one was a complete afterthought...thought of last night after I realized the stencil had the BERRIES on it:)!!...
 I stamped the stem and die cut, then positioned the stem underneath the stencil and used some glitter paste to adorn the stems!  LOVE!!  As with the first one, I polka dotted the background and used the same sentiment stamp as the first card.  
OMG...SUCH FUN!!  I love when cards are fun, easy and you love them when you're done...card making at it's best...and that's these two:)!!
Thanks for visiting me today!! Hugs!! Lisa