Saturday, September 26, 2020

Big Sentiment Stamps with Dies

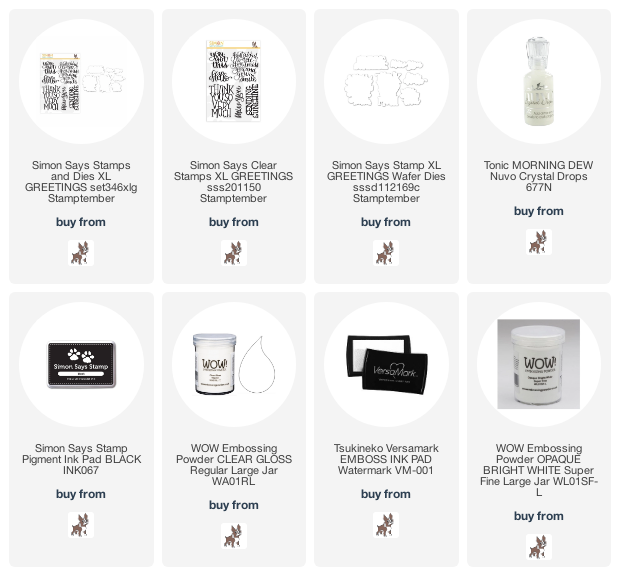
I have used the wonderful new Simon Says Stamp XL Greetings stamps/dies set, from the STAMPtember® release, along with some fun patterned paper, to make some cool, fun, simple, and fast cards...
I used the patterned paper from the Simon September Card Kit.  I had purchased the kit a bit ago, and loved the patterned paper!  The paper is by Vicki Boutin's "Let's Wander" collection. The patterns are kind of bold, so I thought pairing them with the XL sentiments would be perfect, as the simplicity of one sentiment amidst all the color and pattern of the papers would be perfect!  All three cards are done the same, so just know that I stamped the sentiment, embossed, die cut, layered, and adhered to card with patterned paper adhered to it.  I then added clear Tonic drops to each card.  The paper is 6"x 8" , so I used it differently on all three cards!  
This first card is a standard sized card, 4 1/4"x 5 1/2".  Here's a close up...

The second one, I cut the paper to 6" x 4 1/4", and stamped the sentiment of kraft colored paper and white embossed.  Love these stripes...
Here's a close up...

The third one, I made a card using the total length of the paper, for an 8" x 4" card...
Both the first card and this one, I used an off white cardstock for the sentiment, as the patterned paper has off white tones, and is not WHITE.  
Okay...super simple! I love these sentiments, and with some fun patterned paper, the two make for some cool cards...so much fun!!
Thank you, so much for visiting me today!! Hugs!! Lisa

Friday, September 25, 2020

Slimline Framed Thankful Leaves

I had a couple sets of frames left from the sets I made from Simon Says Stamp's Slimline Nested Rectangles dies from the STAMPtember® release for cards on THIS post, and I used one of those remaining two on today's card, along with another die cut rectangle, and a stencil from the release, too!...   
I stenciled the pretty new Floating Leaves Slimline stencil, sponging with three distress oxide inks.  I then die cut it with the very cool new Slimline Marquee die.  I adhered my already layered white frame, and added one of my all time favorite CZ Design sentiment dies.  I sponged some of the red oxide to some cardstock, and die cut the senitment from the colored paper, so it would match.  Here's a close up...
Simply done...simply fun!
Thanks for visiting me today!! Hugs!! Lisa

Monday, September 21, 2020

Thankful Wreath

I've made a card with the pretty new Simon Says Stamp Etched Laurel Leaves die, from their new STAMPtember® release, to make a card of gratitude...
I die cut the leaves from several Fall colored shades of red, yellow and orange, and adhered them to a ring die cut base.  I made the "ring" from two circle die cuts taped together and then die cut, making a ring.  I also layered the ring a few times.  I stamped the cool new Simon Wood Planks background stamp on a piece of light gray card stock with Simon Smoke ink, and then stamped the "thankful" from the wonderful new CZ Design Clean Line Gratitude stamp with versamark and white embossed.  Here's a close up...
Oh, how I LOVE Fall!!  Cards that make me feel Fall, make me happy!  The temperatures are lovely and so cool here, of late, in Virginia, my windows are wide open, and I am loving this weather!  Enjoy this new week in front of you...hope it brings you some happy...hang in there!! 
Thanks for visiting me today!! Hugs!! Lisa

Sunday, September 20, 2020

Sending Smiles

I am LOVING the new stencils in the Simon Says Stamp STAMPtember® release!  I made a card with the cool new CZ Design Deco Squares stencil and new Sending Smiles die...
I sponged the three colors of distress inks over the watercolor paper, then went back over each color with the same color + the stencil.  I added a layered sentiment and done!  SUPER easy and simple...love the sweet simplicity!!  Here's a close up...
Hope you are having a great weekend...having some fun!!
Thanks for visiting me today!! Hugs!! Lisa

Wednesday, September 16, 2020

Sunflower Thanks

I made a tri-panel card with the pretty new Simon Says Stamp Sunflower Background stamp from their STAMPtember® release!...
I stamped, clear embossed, colored cut, layered and adhered the sunflowers to a card.  The panels are about 1 1/4" wide.  I added a "thanks" die cut and layered sentiment by CZ Design, and a new sentiment strip, that is also from the STAMPtember® release.  Here's a close up...
I have been having so much fun...have lots more cards to show you...hoping you are having a wonderful Wednesday!!
Thanks for visiting me today!! Hugs!! Lisa

Sunday, September 13, 2020

Frames and Extended Stencils

I have used the new Simon Says Stamp Slimline Nested Rectangles dies from their STAMPtember® release to make a couple cards...
Slimline cards are all the rage!  These new rectangle dies are made just for these kinds of cards, and they are perfect for simply made slimline cards!  I chose, for these two cards, to keep all the dies together and die cut them so that they actually made frames instead of just rectangular pieces of die cut cardstock.  I die cut  the rectangles 4 times and layered them.  
Then, I had to figure out how to fill these layered frames.  I used two stencils and two CZ Design sentiment dies for my frames.  Only thing...the stencils are not made for a slimline card.  Easy fix....just move the stencil down( after making sure it's cleaned and positioned just right over the already stenciled part).  I sponged color on the cardstock with the four colors I wanted to use, then went back over the colors with the stencil...still sponging the same colors as I first used, just sponging a bit heavier than the first time over the cardstock.  I layered the sentiment 4 times, as well...and for this first one, I cut off the bottom two ends of the "y" in 'birthday" before adhering, so that I could adhere it over the frame without it looking uneven...
Here's a close up...

The second one, I used two sets of adhered frames and one of the new STAMPtember® stencils...
and a close up...
This was so much fun...still have two more frames sets to make two more cards...more fun to come!!
Please stay safe!!  Thanks for visiting me today!! Hugs!! Lisa

Friday, September 11, 2020

Baby Shark 1st Birthday

I wanted to share a card I made for my grandbaby's 1st birthday...
My pictures were taken in my son Noah's van!  I had forgotten to photograph the card until I was on the way to give this to my little man, so I used the dashboard of the van for my photo shoot(this was shot at a red light😄)!!  Gabriel LOVES the Baby Shark video, so I chose to make him a baby shark card.  The baby shark in the video is yellow, so the shark on the card had to be yellow.  I used the Lawn Fawn Duh-Nuh stamp/die set for the shark.  Duh-Nuh...it took me a bit to figure that one out.  Duh is a word I use at my stupidity...like not taking a picture of the card before on the way to give it away!  BUT, when you put the Duh together with the Nuh...it's...JAWS!!  DUH!!  
Anyhow...die cut, colored, layered  and adhered the shark to the penny behind the die cut slider, which was made with a die also from Lawn Fawn.  I decided after my last slider card, to buy a set of dies that are MADE to make slider cards, rather than make my own...life's too short!  The waves were done with a Simon Says Stamp Waves background stamp, the discontinued "happy birthday" is Jumbled Happy Birthday by Poppy Stamps, bent after layering to kind of follow the waves.  The "st" is Papertrey Ink and the "1" is Simon Simple Numbers(retired too, it would seem).  I just realized the "Happy 1st" should have been a tad more to the left...oh well...perfection is highly overrated?!  You get the idea, right?!  Here's my beautiful little guy at the beach with his shark trunks...he is such a sweet boy...he brings such joy to my life...
Here's a close up...
and here's a video showing the baby shark moving back and forth...
...a penny under the image you're trying to slide is perfect!!  
This card was fun...love to make cards that are meaningful, for my family!
Thanks so much for visiting me today!! Hugs!! Lisa

Thursday, September 10, 2020

Thankful Wreath

I've made a card with the pretty new Simon Says Stamp Detail Elm Leaves die from their newest STAMPtember® release!...
I die cut and arranged the leaves around a white cardstock die cut ring that I had layered for the leaves to be adhered to.  I adhered each leaf with a glue dot to the ring base and cut the stems off the leaves.  I stamped the panel behind the ring with the pretty new Damask Background stamp and used the CZ Design Thankful sentiment die, layered, for the middle of the wreath.  Here's a close up...
A pretty easy and fast card...after determining how many colors I was going to die cut, and their arrangement...but I have to say, I love the way this one turned out...it makes me happy and it's not even rainbows!  Fall is on the way, that makes me happy!!!  I am thankful everyday for all the incredible blessings in my life...maybe take time today. to remember something you're thankful for:).  Thankful for you!!  
Thanks for visiting me today!! Hugs!! Lisa

Monday, September 7, 2020

Halloween Outlined

I have made a simple Halloween card today, using the new Simon Says Stamp Outline Halloween die and the Wood Planks background stamp, from the exciting new STAMPtember® release...
I cut strips of black, gold and two shades of orange, adhered together and die cut, for the sentiment.  I layered it, and kept the outline white.  I adhered it to a dark gray background, stamped with the Wood Planks background.  The extra sentiment is from the cute new Simon set, The Boo Crew stamp set.  Here's a close up...
Love it when a sentiment die is totally enough for a card...well, the background and sentiment stamp were a sweet help, too:)!!  Thanks for visiting me today!! Hugs!! Lisa

Wednesday, September 2, 2020

STAMPtember® Party!


I am thrilled to be joining a whole bunch of amazing artists today, to celebrate Simon Says Stamp's STAMPtember® release on theSimon Blog today!!  Simon Says Stamp celebrates all things stamping throughout the month of September on their blog with STAMPtember®an event intended to inspire, educate, and celebrate the fun of rubber stamping!  I have chosen to use the very cool and fun new Latte Gift Card Slider die for the party today!...


This die is sooooo cute and has so many endless possibilities!!  Gift cards to favorite coffee shops are the perfect thing for this sweet whipped cream latte, but you could give a bag of coffee with the mug(I used my very favorite for these pictures😊), and put a general gift card inside, too! 
The first one, I used a piece of blue cardstock, stamping the new Hexagon Tile Background stamp onto the paper with versamark and gold embossed.  I die cut the mug, then used a blue marker and colored every other triangle in the hexagons.  Here you can see the pretty gold...
I  added two white whipped cream die cuts, one with the gift card slots.  I opted to put a full die cut whipped cream panel OVER my gift cards, as I wanted to keep the card hidden behind the whipped cream...personal preference, totally!   Here's the latte all taken apart...
The second one, I chose to use a piece of patterned paper for the mug, using a cream color base, the cream colored handle showing through...

On this mug, I also die cut the heart and cinnamon stick from the set!  Here's the set, taken apart...
Although the first thoughts I had when I saw this die were that it would be perfect for the Christmas holidays,  I wanted to show you that this die can be used for other occasions, like birthdays...  
I used a rainbow of heart patterned papers adhered and then die cut for my birthday mug!  I then added the heart from the set with "happy birthday" stamped on it, and used the sprinkles die from the set, to make a rainbow of colored sprinkles on the whipped cream!  Here's the latte taken apart...

You could make this mug into a card, I simply put a back on the mugs, to keep the gift card from flailing around in the back.  This is a pattern of how I adhered the back of the mug to a second piece of cardstock.  
This is the back of the mug, after adding the cardstock...
I had SO much fun making these!  Simple die cuts that are simply adorable!!  

I hope you will check out the other artists who are a part of today's party, you can find the complete list over at the SIMON BLOG!  Remember, the code up above is one you can use to receive the Hope die set free with any purchase!  The really fun thing about this party is that there are many different promotions on the blogs of the participants of the party, today!  The more blogs you visit, the more different promotions you will find...what fun!!
The SIMON BLOG will be full of STAMPtember® events and special releases throughout the months of September...hoping you will join the fun!!  
Thanks for visiting me today!! Hugs!! Lisa

Tuesday, September 1, 2020

Happy STAMPtember®!!

It's September 1st, and over at Simon Says Stamp, it's STAMPtember®!  For the entire month of September, Simon Says Stamp celebrates everything stamping!!  This is the 11th year of Simon's STAMPtember®...an event intended to inspire, educate, and celebrate the fun of rubber stamping!  This is a HUGE release, filled with the most amazing collection of stamps and dies and beyond...you have to check it out!! I have made three cards using one of the very cool new slimline stamp sets, Slimline Greetings to share with you to start this month long fun fest!!...
I stamped the first sentiment stamp in my MISTI with smoke ink.  I colored the letters, then put the colored card stock back in my MISTI, and gold embossed.  I put the sentiment between two popped up panels with gold strips, then dotted with clear tonic drops.   Here's a close up...
The second one, I used the new stencil, Floating Leaves with the Happy Thanksgiving sentiment...
I brushed some watercolor paper with three colors of distress oxide inks, then embossed the sentiment in white.  Here's a close up...
The third one, I used the merry christmas sentiment...
I stamped this sentiment the same way as the first.  I colored the letters wth a dark blue, and around all the letters with a light blue.  I then put the card stock back in the MISTI, brushed with my magic embossing bag, and embossed with silver embossing powder.  I went back over the sentiment with the new Large Falling Snow stencil and white ink to subtly put a few snowflakes on and around the sentiment.  Here's a close up...
This was soooooo much fun...these sentiment stamps are amazing and make for some really cool slimline cards.  There will be a HUGE party tomorrow on the Simon Blog with a lot of artists and a lot of inspiration...hoping you will join in the fun!!  Until then...
Thanks for visiting me today!! Hugs!! Lisa