Tuesday, December 28, 2021

Peony and Leaves

I have made a card with the very pretty Simon Says Stamp Peony and Leaves die, from their new To the Moon release...
I used three different shade of pink paint chips, and two different shades of green chips for the flower and leaves.  I layered the flower, and added some Tonic drops for the berries.  I added a sentiment from the new CZ Design Love Garden Greetings and one from the new Simon So Much Love stamp sets.  I popped  up the panel on a card.  Here's a close up...
I hope, for those of you who celebrated it, that you had a wonderful Christmas.  Now, it's on to the new year...hoping for a better year in 2022 for me and for you!
Thanks for visiting me today!! Hugs!! Lisa

Saturday, December 18, 2021

XOXO Sending Love

I've made a card with the one of the very cool new CZ Design dies from the Trio of Love die set, and a sentiment from her Love Garden Greetings stamp set, from Simon Says Stamp's new 
I made stripes of three different shades of pink paint chip and adhered them to cardstock.  I then adhered then to a section of the card, diagonally.  I cut another card sized panel of cardstock in two and cut them to fit the strips, large enough for the "xoxo" sentiement die cuts, which I had layered.  Before popping the white panels around the paint strips, I stamped the "sending love " sentiment with versamark and black embossed.  Here's a close up...
I had the idea to make this card when I saw this die...I love it when a card turns out just as you imagined...fun!!
One week til Christmas...definitely not ready, but ready or not, here it comes! Take care, please stay safe!!  Hugs!! Lisa

Friday, December 17, 2021

Merry Christmas Money Card

I have made a card for a family member who wanted money for their Christmas gift...
I used the wonderful Lawn Fawn Giant Merry Christmas die that I have had for a while, and thought perfect for this card! I used a mini slimline card, as it's size is MADE for money...6 1/4"x3 1/4"!  
I used Sunny Studio Holiday Cheer paper, cutting the red and two green dotted papers into strips, and adhering to thin cardstock before diecutting the sentiment.  I then layered the die cut, and added a layered die cut heart to go with the sentiment strip, both Simon Says Stamp.  I also used a mini slimline envelope for the card.  This card makes me happy!  Here's a close up...
Hope all is well in your part of the world...beautiful weather here in VA...windows open today!
Thanks for visiting me today!! Hugs!! Lisa

Thursday, December 16, 2021

To the Moon Release!

The new Simon Says Stamp To the Moon release just out today, has me over the moon!  I have made a couple cards to begin the celebration, using two of the new dies and a stencil..,
This card was so much fun, so easy and so quick to make!  I used the cool new Polka Hearts stencil with two of the new Simon saturated inks.  I then blended some of the darker pink onto cardstock and die cut the sentiment background of the new CZ Design Love You die. I then adhered the layered sentiemnt to the  layered and popped up background.  LOVE!!  Here's a close up...

I then used the same sentiment with a different look...
I combined the sentiment with the pretty new Wreath of Love die!  I layered both, popped up the wreath on die cut strips that I had adhered to cardstock.  Here'a a close up...
Hope you will check out the To the Moon release,  to see all the new "love"ly products...I love love!!  Hope you have great rest of your week...thanks for coming by my blog today!! Hugs!! Lisa

Tuesday, December 14, 2021

Sketched Rose Wreath Hot Foil

I broke out my Glimmer Hot Foil system I had purchased a while ago, but was too unsure to use, and gave hot foiling a try...
I used the beautiful Simon Says Stamp Sketched Rose Wreath Hot Foil Plates and dies from their Diecember® release to start my experimenting!  I used the Hot foil plate with my Big Shot.  I watched a video (thank you, Sharon), using the hot foil system on the Big Shot, to become brave, as I had only seen artists use both the Platnium die cutting machine in conjuntion with the foil machine, when I had seen this done in the past.   My budget didn't have room, and my room didn't have room for the Spellbinder Platnium machine on top of the foil machine, so I wanted to make it work!  This was so simple and I love the beautiful gold on the wreath(I used the foil from the kit)!  Having die cuts was such a sweet extra, this whole thing was so simple and so much fun to do!  I colored with markers, then layered the wreath, flowers, and leaves.  I changed so many things about the sentiment and background...I tried a gold sentiment, a white sentiment on the gray, I tried a white background, a plain gray background...settled for what you see...pretty happy with it.  The stripes were made with a very old Papertrey Ink impression plate(no longer available, much loved, and still used...a lot!).  Here's a close up...
ELEVEN DAYS til Christmas...YIKES!!  It will come no matter if we're ready or not, but hope you're not stressing...do what you can, and let the rest go!  I know, easier said than done, but try!  
Thanks for taking/making the time to stop by, today!! Hugs!! Lisa

Sunday, December 12, 2021

Stylized Butterflies

I've made a couple cards with the beautiful new Simon Says Stamp Stylized Butterfly die and stencil from the DieCember® release...
I LOVE the idea of a stencil to go with an intricate die cut like this...it makes it easy for creating and for creativity!  I made two very similiar cards in design, but what I thought to do was change the direction of the ink blending.  This first one I blended horizontally, the second one vertically!  I used five different colors on the first butterfly.  I layered two of the die cuts, adhered them to the colored stencil butterfly, after adding an older much loved Simon sentiment.  Here's a close up...

The second one, I opted to used three shades of blue for my butterfly...
I chose the darkest shade for the middle, and lightened as I blended out from the middle. I swiped a small piece of cardstock with the darkest ink and die cut the butterfly's body(thorax and abdomen) and layered.  I used a "missing you" sentiment as I felt it kind of went with a "blue" butterfly.  Here's a close up...
 
These cards were so much fun to make...super fun!! Hope, in the craziness of the season, and all the things that have to get done, you make some time for fun!!
Thanks for taking time to stop by!! Hugs!! Lisa

Friday, December 10, 2021

Embossing to Color

I have made a couple cards with two of the cool new dies by Simon Says Stamp from their DieCember® release...
The first one, I used the Mini Slimline Lattice die.  I wanted a rainbow underneath the pretty lattice, so I embossed the lattice on a piece of cardstock, and used my blender brush and some of the new Simon Pawsitively saturated inks and got to work.  Embossing the die, made following the lines of the lattice so easy!...
I die cut the lattice twice more, adhered them together, then to the colored piece, and then to the card.  I used the CZ Design Thanks die for my sentiment, layered and adhered to the bottom corner...done!  Here's a close up...

The second one, much like the first...
For this card, I used the cool Triangle Burst Medallion die!  I didn't clic a pic of the initial embossed inking, but I did it just like the first, embossing the die on cardstock, and blending the ink for this one, based on the circular design of the triangles.  I then die cut the medallion, and adhered one die cut on the bottom, and two layers on top of the colored piece.  Here's a pic of before adhering the die cuts on top...
I used a Simon sentiment strip for the sentiment, and added some Tonic drops for some added bling...
Had some real fun making these cards...hope you find some fun today!!  Thanks for stopping by today!! Huge hugs!! Lisa

Wednesday, December 8, 2021

Privet Branch

I've used the beautiful Simon Says Stamp Privet Branch from their DieCember® release, to make a Christmas card and a birthday card...
I die cut the branch and leaves and left it in the cut cardstock.  I used Simon Laurel Green ink, and a blending brush, and brushed ink all over the branch.  I also did the same with the sentiment.  I layered each of those with one more layer.  I bent the leaves of the branch a bit for some dimension, and adhered to a panel that I made snow on, with a Simon snowflake stencil and some white embossing paste.  I used some old Enamel Accents, and made some "berries" by putting some dots onto a piece of acetate and letting them dry,  I have to say, enamel accents makes much better perfect circles that "look" like berries...and the red is RED...just wondering whatever happened to them?? Anyhow...popped it all up on a card and here's a close up...

The second one, I made a simple, very gold, birthday card...
I did this one, much like the first, minus the snow.  I used a piece of striped craft/gold cardstock that I purchased from a store...so old that I can't remember which one...but, if you really like the look, you could try to make gold stripes on craft cardstock!!  Here's a close up...
Such simplicity...makes me happy!! A rainy, cold day in Virginia, hoping your day is sunny and you're warm or staying warm, wherever you are!!  Thanks so much for visiting me today!! Hugs!! Lisa

Giant Thank Yous

I have made a couple cards with the Lawn Fawn Giant Thank You die...
I must admit, right off, that, while searching for inspiration, I was a bit smitten with a JC Penney gift card I saw, and this thank you card is the result...thank YOU, Penneys!  I embossed the thank you imprint on a piece of cardstock, and brushed ink onto all the letters.  I dried the ink, then die cut and layered.  I used a Simon sentiment strip and a tiny layered heart to complete the sentiment.  I used a doube stitched rectangle die, popping up the middle portion and done!  Here's a close up...
I had a whole bunch of "trial" pieces on my desk, so I made a second...
I die cut the "thank you" from gray cardstock and layered.  I used a Simon heart die to cut a heart from a Sunny Studio piece of snowflake paper.  I used another of the Simon sentiment strips, and another layered heart, this time red to stand out on the card of gray and white!  Here's a close up...
Okay...such fun!!  Hoping your day is a good one...maybe even great one!!
Thank you, from the bottom of my heart, for visiting me today!!💗 Hugs!! Lisa

Thursday, December 2, 2021

DieCember® Blog Hop!

I am thrilled and so excited to be a part of today's Simon Says Stamp Blog Hop over at the Simon Blog, celebrating Simon's latest release,
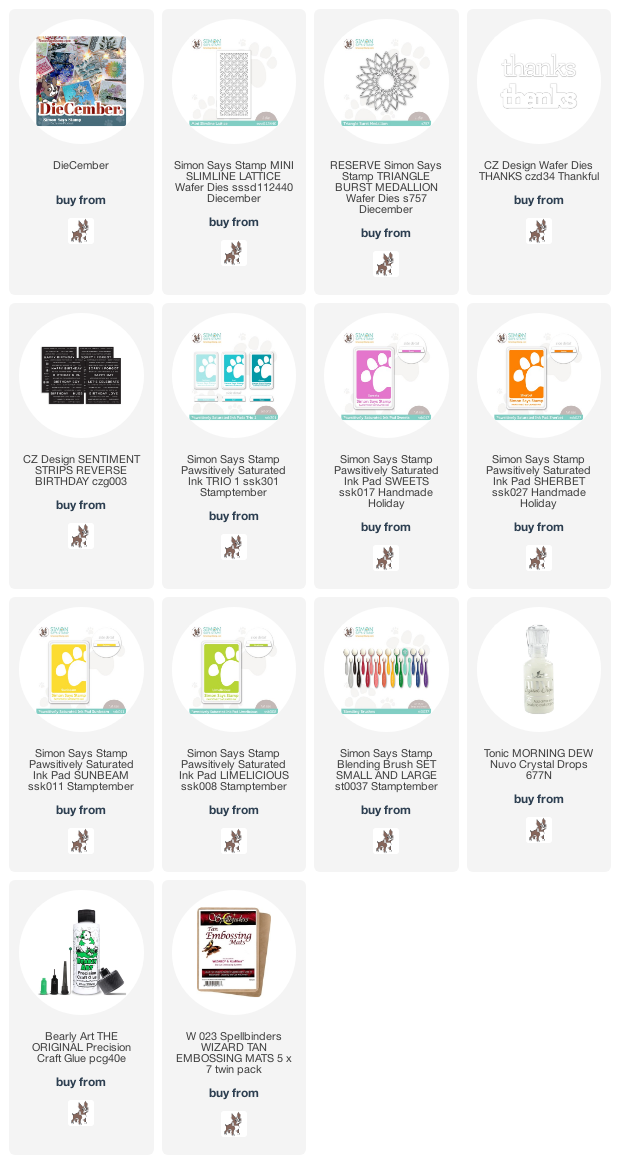
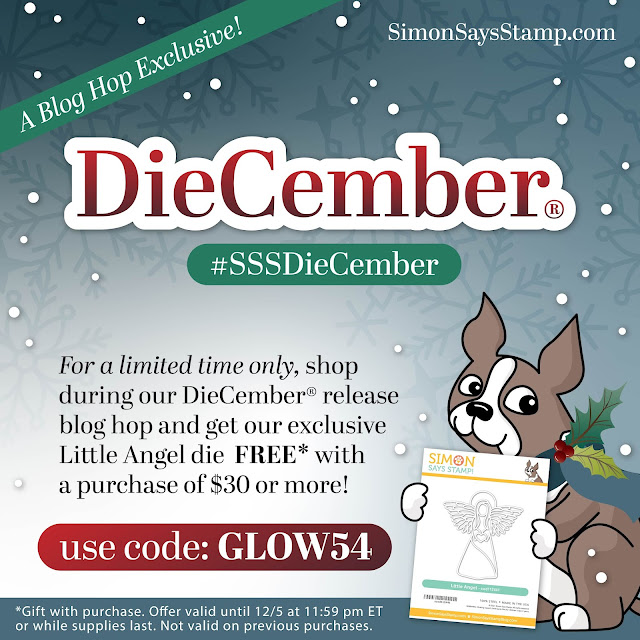
 DieCember®!  
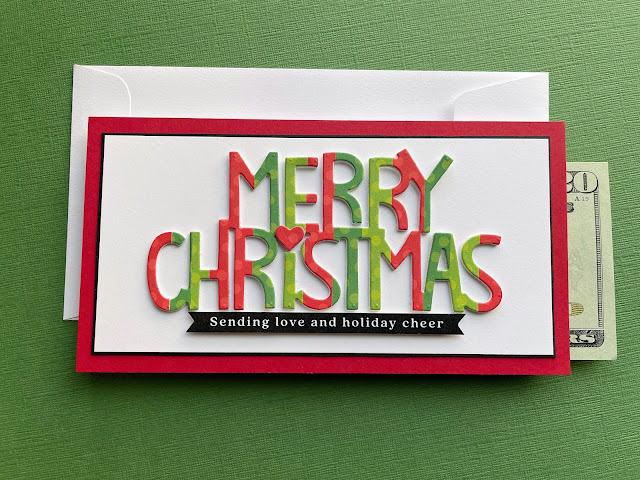
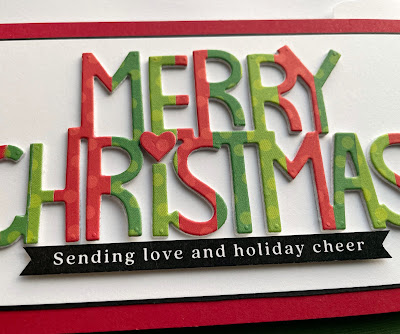
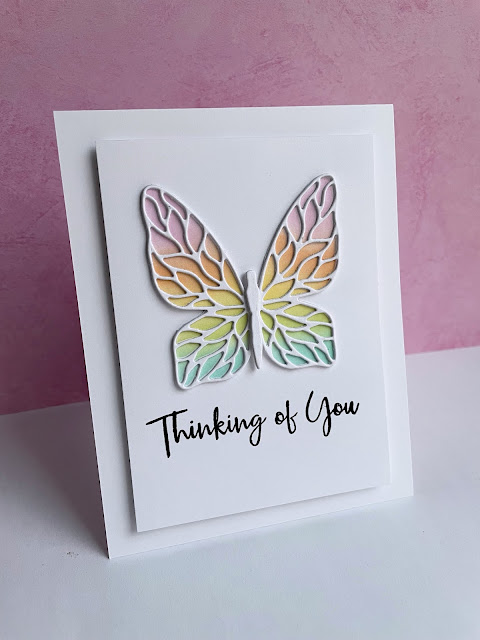
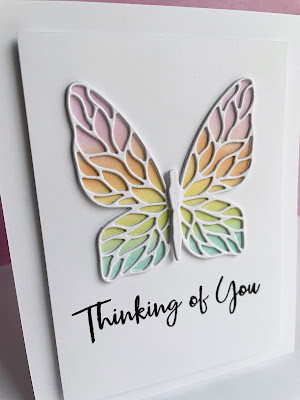
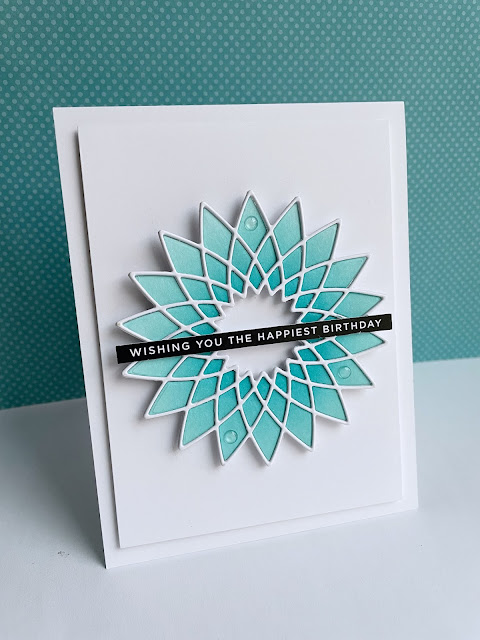
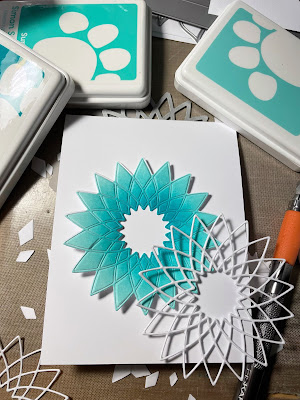
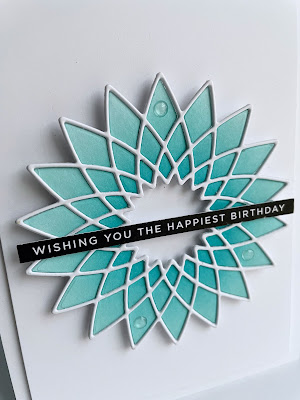
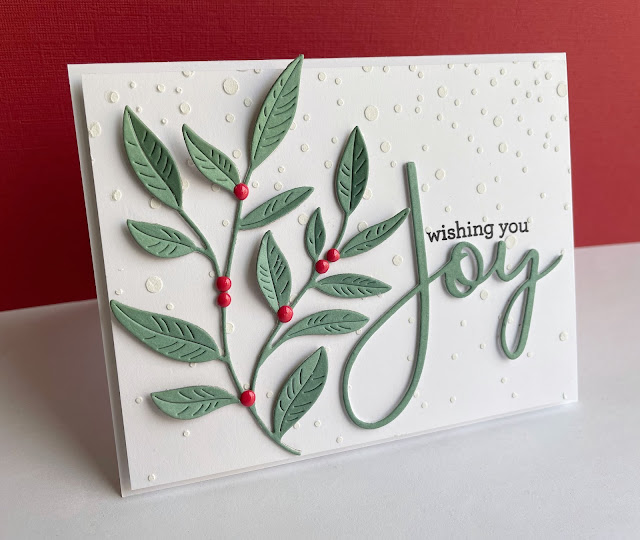
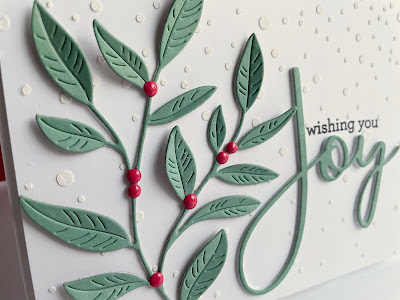
DieCember® is a registered Simon name for this release, that happens every December 1st, and is a month long celebration of dies and die cutting!  I have used four of the wonderful new birthday dies to make three rainbow colored birthday cards to share with you today!...
Birthday cards are a staple of cardmaking, and this release has some wonderful birthday dies to make some sweet birthday cards!!  This first one, I used the very cool Bunch of Balloons and It's Your Birthday dies.  I used a rainbow of cardstock scraps for the balloons, layered the balloon borders and tucked them behind a layered sentiment.  I used my white gel pen to give accents to the balloons.  I used a piece of polka dotted paper from my large stash of papers for the background.   Here'a a close up...

The second one, I used the sweet Party Candle die to make another rainbow filled birthday card...
 I die cut the candles from a rainbow of cardstock pieces, popped up each candle with sticky foam, and added a stamped, die cut sentiment over them.  I brushed the small flames with my wink of stella brush for some glimmer and shine, and popped up the whole panel on the card.  Here's a close up...

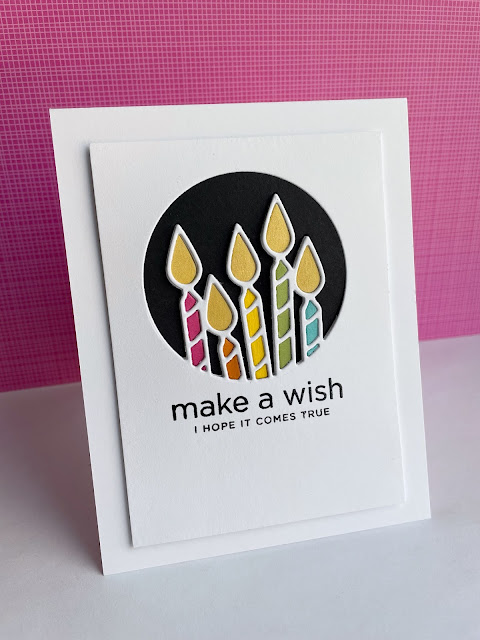
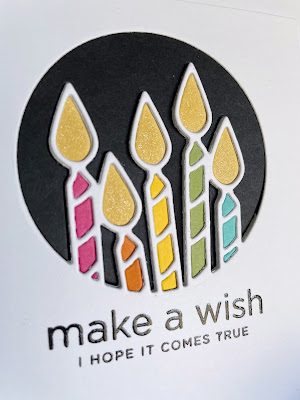
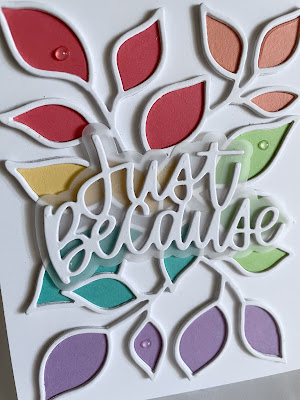
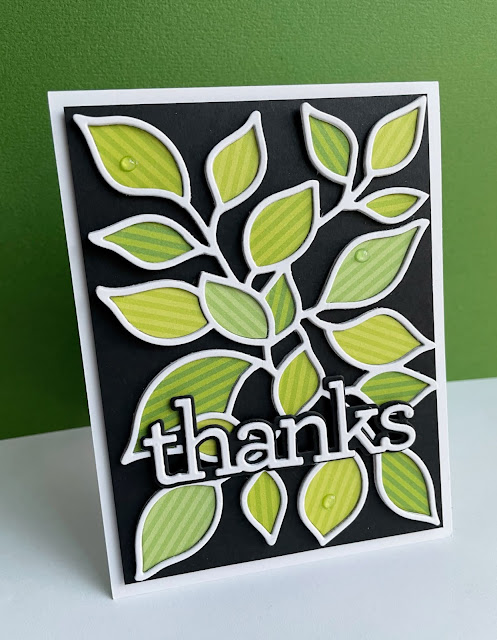
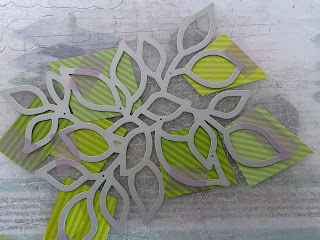
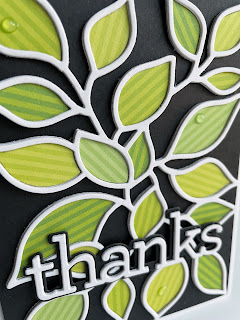
My last card, I made with the cute Birthday Candles die...
I die cut the candles and made their stripes a rainbow.  I layered the candles and used black cardstock for a more striking background.  I used a  couple CZ Design sentiments that I thought went perfectly with these cute candles.  I, again, brushed the candle flames with my wink of stella marker.  Here's a close up...
I've had such great fun making my cards, but the fun is just beginning for you!
Simon is generously giving a $25 coupon to every stop on the hop from our comments section, so the more blogs you leave a comment on, the more chances you have to win!  The winners will be posted on the Simon Blog on Wednesday, December 8th, so make sure you check the blog on the 8th, to see if you're a winner! 
The list of participants for today's blog hop are below:

Before I go...don't forget the offer in the banner at the top of my post! Simon is offering a Little Angel die with any $30 purchase!  Simply use the code GLOW54, to get your beautiful die!  Just remember, the offer is only good until the end of the day on December 5th OR until supplies last!

Second...there is another blog hop tomorrow!  So please visit the Simon Blog tomorrow for another day of celebration and inspiration!

Thank you so much for stopping by...keep on hopping!! Hugs!! Lisa

Wednesday, December 1, 2021

It's DieCember®!

It's December 1st and that means it's DieCember® over at Simon Says Stamp!  DieCember® is a release filled with LOTS of AMAZING dies!!  I LOVE dies, so this release is especially fun for me!  I have used two of the new dies on my cards today...
The new Vine Background die is simply beautiful!   I die cut the vine, adhered different colored die cut cardstock in the openings and adhered two layers over the colored pieces.  I used the Just Because die, layered and used vellum behind, so as not to lose the leaves behind the sentiment, but to give it some separation.  I added a few tonic drops for some bling.  Here's a close up... 

Then, I had an idea for a green leafed vine...
I used 4 different striped green papers, from Sunny Studios and Doodlebug, and die cut each so that the stripes were going in a direction of each leaf.  I know, sounds like a lot of work, but I die cut multiple leaves with each pass through my machine, so it was super easy!!  Just moved all the tape around with  new cuts.  This pic shows cutting 7 at one time...super fast...
Layered like the first, but this time, I put the leaves over a black panel.  I just LOVED the contrast, and when I added the CZ Design layered "thanks", well, I loved it even more!  
Here's a close up...
Hope you will check out the new release, I have it linked above and below in my links, and there will be two days of Hops at the Simon Blog, tomorrow and Friday...really hope you'll check them out for some wonderful inspiration!!  Have a wonderful first day of December!!  
Thanks so much for stopping by today!! Hugs!! Lisa