Wednesday, September 13, 2017

Corbel Christmas Wreath

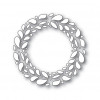
 I recently purchased the Simon Says Stamp Corbel Wreath die...I know, late to the party...better late than never, I always say:)!!  I had thought it was so pretty when it came out a few releases ago, but it went out of stock.  It came back in, and with a few things I had to get from the Stamptember® release, it is now in my possession!!   I made my first Christmas card of the season with this oh so pretty die:)!!...
The first thing I have to mention is the color of my wreath.  I had the color in mind before I even got the die!!  I had purchased the new Simon Says Stamp Laurel Green ink a while back, and thought the "laurel" would be perfect for this wreath!!  SO...I swiped the pad on some cardstock(the swiped panels had been hanging out in my craft room for a couple weeks๐Ÿ˜†), and die cut the wreath from two swiped panels (if you know me, you KNOW I HAVE to layer!!๐Ÿ˜Š).  Here's what one looked like after I die cut and adhered to the card...
Notice the dots are still in the die cut.  I opted to simply use the leaf looking pieces, squirting tiny drops of glossy accents on the back of each leaf and then pressing the wreath onto the card.  The dots were simply too many and too little...it would have made a mess to try and adhere them in this same way.   I allowed the leaves to dry for a bit, then carefully lifted the green piece of cardstock off of the card.  Do not be disappointed if some leaves don't stick, simply apply another dot or two of glue and try again with what remains.  I then die cut the second swiped panel, took a top and bottom leaf out of the die cut to be able to see where to perfectly position the panel on top of the wreath already on the card (I chose the ones that kind of look like birds, they have a little swivel to them), and voila...a layered wreath...even with all those little pieces!!  I filled in the places where the dots had been, and maybe even not have been, with red rhinestones in three sizes...here's a close up...
I added a pretty sentiment from the new Stamptember® release set, On a String, in the same Laurel Green as the wreath.  I also stamped a little border for the bottom, for, as mistakes would have it, I didn't position the wreath perfectly, so I chopped some of the top off, adding the striped panel to the bottom....I kind of like mistakes sometimes!!  What a simply lovely wreath...ahhhh...this card speaks to me...Merry Christmas, indeed๐Ÿ˜Š!!
Thanks for visiting me today!! Hugs!! Lisa
Tuesday, September 12, 2017

Memory Box Stitched Squares #1

I recently purchased the Memory Box Stitched Squares and Stitched Circle dies...ok, just have to say...these dies are SO...MUCH...FUN!!  There are literally endless combinations and variations of things you can do with them!  The title of this post is part of my way of listing the many different ways I can use this die, so...here we go with #1...
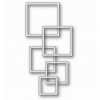
The dies on the packaging, show the dies kind of how I have them on this card, but the VERY cool thing is...the dies are ALL INDIVIDUAL..they ARE NOT CONNECTED!!  The packaging is a bit misleading, but how cool for us!!  I had thought of a bunch of ways I could have used them being connected, thus why I purchased the die, but even better that they aren't!!
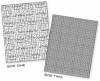
I die cut and layered the outside squares, filled with a single layer of an embossed pattern(using texture plates) using one of  the cut out from each of the colored squares, added a sentiment to the card, then layered the squares on top of each other.  I DID hand cut a full piece of each color for the back of each square, cutting around each square frame as a pattern,  to adhere the layered sqares and the patterned piece onto the same solid piece for adhering onto the card more easily.  Here's a close up...
Thanks for visiting me today!! Hugs!! Lisa
Wednesday, September 6, 2017

Four Metallic Fish Thank Yous

I opened up the beautiful new Simon Says Stamp Under The Sea stamp set from the new STAMPtember® release and was simply smitten with the fish image in this set!!  I have four simply stated and created cards to share with you using this one beautiful stamp from the set...
I thought this beautiful fish would look wonderful in gold on black, I'm not showing you, but I made a BUNCH of them!! I had a piece of watercolor paper on my desk, and I loved the way the texture of  the paper looked against this image, so I used watercolor paper for the background panel of these cards!  The sentiment is one of my favorite, from the Simon set, Bouquet of Thanks stamp set! I DID put a couple layers of chipboard behind each stamped fish...loved a little pop!   I loved him on black with gold metallic powder...here's a close up...
SOOOO,,,I tried him in silver...LOVE!!....
and another close up...
AND....then in COPPER...
and a close up...
BUT...MY FAVORITE...all three metals used on one fish!!
I stamped the fish with versamark and sprinkled silver, then gold, then copper, then gold and silver again in lines.  The only down side to this fish, is that the embossing powder will get mixed, no matter how careful you may be, so I disposed of the mixed colors....just sprinkle lightly!!  I just LOVE the varied colors (I made a bunch of these, too...and they are all different!!).  Here's a close up...
I am loving sheer simplicity...and these are simplicity and elegance combined...this fish is so stinkin lovely!!  What wonderful fun I had making these cards!!  Thanks for visiting me today!! Hugs!! Lisa

Tuesday, September 5, 2017

Happy Birthday Flowers

I made a birthday card with the My Favorite Things Stitched Flowers dies set and a Papertrey Ink sentiment...I know I've said it before, but worth repeating...I LOVE THESE DIES!!...
I layered the flowers, their centers, and leaves, added a Papertrey Ink sentiment, and some enamel dots, on a stitched rectangle!  Here's a close up...
I love making cards with flowers!!  Thanks for visiting me today!! Hugs!! Lisa

Sunday, September 3, 2017

"Love"ly and Simple

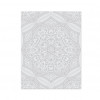
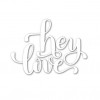
The new release over at Simon Says Stamp, Stamptember® is full of new stamps, dies, stencils and more, as well as a very pretty embossing plate, Cora, a design just like the background stamp that came out in a prior release.  This embossing plate is BEAUTIFUL!!!!  I made two, very simple cards using the plate and a die cut Simon sentiment...
 This plate is very thin, and not at all like embossing plates that I have worked with before.  It does NOT use the embossing pads, but rather works like a die cut...I actually used a metal shim AS WELL as an extra layer of paper with my card, to get a really embossed impression.  I absolutely LOVE the delicate and beautiful look of this plate...ahhh...and paired with a "love" sentiment (all those hearts were just screaming love, but you could use ANY sentiment!).  I layered the "love" and simply adhered it to the embossed card.  White on white...I loved it!!  Here's a closeup...

The second one is just like the first, except I attempted to use some color ....
I have been unable to get the Tonic Dual Tipped Blender Brushes...not available ANYWHERE!!!!!!(I HAVE linked them below at Simon, for when they DO come in!)....but I DID have a makeup brush that I got with some foundation that I wasn't going to use, so I tryed my hand at blending some color with my makeup brush...not perfect, but I thought it looked cool...the white sentiment against the pink looked cool, too!  Here's a close up...
Ok...SO...MUCH...FUN!!!!  SIMPLE, PRETTY, FUN!!  Thanks for visiting me today!! Hugs!! Lisa