Thursday, October 13, 2016

Heartfelt Sympathy

Sympathy cards are so tough...I've read it's best to make them when you don't need them, but it's hard for me to make them even when I don't need them...just saying.  I made a sympathy card with some Papertrey Ink dies and a much beloved stamp from a Reverse Confetti set(this set is one of my favorite go to sets!!).

I layered the triangles three times and cut off the part of the triangles that were extended a bit(look at the pic of the link below to see what I mean).  I filled in flower and leaves of the die cut  and adhered them to the corners of the card, after stamping and embossing the sentiment.  Here's a close up...
Thanks for visiting me today!! Hugs!! Lisa

Tuesday, October 11, 2016

Burning a Metal Die Cut

I pulled out the older Memory Box Fresh Foliage die the other day...I was going to use it for a CAS(E) this Sketch challenge I was working on.   But if I used it for the challenge, I would have had to cut some of leaves off it, and I couldn't do it....
I die cut the leaves from a copper adhesive metal sheet(Ranger...I linked it below, but it's no longer sold at Simon... but wanted you to be able to see what it looks like) .  I also die cut another set of leaves from a piece of heavy white cardstock.  The cool thing about this metal sheet, is that it has adhesive on the back of it, so I simply removed the protective strip from the metal die cut and carefully adhered it to the white die cut, giving the metal more stability.  A little hint...when you die cut the leaves with the white, try really hard to keep the die cut IN the piece of cardstock, it makes it alot easier to accurately adhere the two die cuts together.   I wanted to "toast" the leaves after die cutting...I can't remember where I first did this or who I gleaned this from, it's been a while, but you can alter the colors of the metal by heating them up, and I thought it would look more like"Fall"with different colored leaves.  I think most would use a blow torch, but I used a grill lighter.  This kind of grill lighter...the flame is like a torch...notice the tip, it's very different from a simple flame lighter...
You simply hold the flame not too close, about 6" from the die cut, moving it around a little, and as soon as the color of the metal changes, move the flame.  Take my word...keep the flame on a little too long, and you'll have a real flame and burned leaves....that was what happened on my first attempt.  You might want to try it out on a sample before you do the "real thing".  It is SO COOL, though...such fun!!  Here's a close up...
I used an old Stampendous rubber stamp for the sentiment.  The background is Impression Obsession.  I have always loved this die...still do!  Thanks for visiting me today!! Hugs!! Lisa

Monday, October 10, 2016

CAS(E) this Sketch 193...Pink Flowered Thanks

I'm having so much fun with the sketch this week at CAS(E) this Sketch!!  This is my second card...I know...it has the same cubed background, but a different flower.  When I made the first card, I thought that the cubed strip was too far over to the left on the card for the sunflower, so I made a second cubed background.  Having so much fun and rather than waste the card, I decided to make a second card...this card has the FIRST background on it...thought it went perfectly with this die cut flower and "thanks"!  The flower and sentiment are My Favorite Things...love these flower dies!!  Here's my card and the sketch...

I layered  the flowers, leaves and sentiment three times.  I masked then sponged the strip of cubes for the background from the stencil.  OK...these flower dies are SO MUCH FUN!!!  Here's a close up...
Thanks for visiting me today!! Hugs!! Lisa

Sunday, October 9, 2016

CAS(E) this Sketch 193...Sunflower Thanks

What a fun sketch this week at CAS(E) this Sketch!  Here's my card and the sketch...

I chose a simple sunflower...the Simon Says Stamp Radiant Sunflower was the perfect pretty flower for this sketch (layered the flower, and stem 3x, the center may have 5 layers), sponging the background with a stencil after taping off a section.  The sentiment die is also from Simon, I chose the same brown textured cardstock that I used for the sunflower's center.  Here's a close up...
I'm thinking about another flower with this same sketch...such great fun!!  Thanks for visiting me today!! Hugs!! Lisa

Wednesday, October 5, 2016

Four Panel Happy Birthday

I made a card a few weeks ago HERE, and decided to make another similar, but this time, instead of using patterned paper, MAKE my own divided paper...
My stripes are thinner, only a couple sixteenths of an inch away from an A2 sized card(I was too lazy to be exact, but it's unlike the last card that was 6"...I'll just make a little larger envelope:)!), and the sentiment overlapped the spaces, but I kind of like it:)!!
I chose to use textured paper in between the gold stripes, and used my Simon Says Stamp "Happy Birthday" die as my stand alone sentiment.  I layered it three times, and glossy accented it after adhering it to the card.  Here's a close up...

Making cards...ALWAYS such great fun!!  Thanks for visiting me today!! Hugs!! Lisa
Tuesday, October 4, 2016

Happy Birthday with Love Candles

I had gotten the My Favorite Things Make a Wish dies a couple months ago...just getting around to playing with them after I got some really sweet Doodlebug patterned papers...
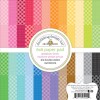
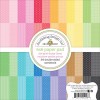
I LOVE these Doodlebug patterned paper packs!!   They are filled with papers that have amazing colors...it's in their names...RAINBOWS!!... and the patterns are MADE for card making, they are small with a lot of variety which make them perfect for die cutting or even using for a background...AND there is no white in the patterns which I also love for wonderful die cutting, especially sentiments!!! Ok...I really LOVE them!!   I used the papers for my candles and having the hearts in the die set, I chose to adhere hearts to the flames.  I layered the candles and flames with three layers underneath the colored papers...the hearts with one layer underneath.  The sentiment is from an old set of My Favorite Things sentiments, More Essential Sentiments, cutting apart one of the sentiments from the set for the "with Love"
Such fun!!  Thanks for visiting me today!! Hugs!! Lisa
Monday, October 3, 2016

Peace, Love and Joy

Ok...I know there are those of you who wouldn't consider watching a Christmas movie on October 2nd, but I love and would watch them anytime:)!!  ELF was on last night...saying I LOVE that movie is an understatement...and watching it inspired a Christmas  card last night...it brings me great JOY...
 I had purchased the Hero Arts Stamp and Cut sets last year AFTER Christmas(they were out-of-stock DURING)...the Joy set was calling me from my box of Christmas stamps/dies!!  I die cut 3 layers of the "JOY" from white cardstock, and then put 3 layers of versamark on the sentiment, and gold embossed 3 times for a thick layer of gold(2 layers was nice, but 3 layers made such a difference in the look of the sentiment...).  I decided, with the stamped sentiment I chose from the set, to exchange the dot on the "joy" for a heart...layered three times, as well.  I stamped the sentiments with versa mark, as well, gold embossed and colored the leaves with my Prismacolor markers. The layout is one that I chose from a card I made last month with a patterned paper that had gold divisions on it.  I chose textured dark red paper and a dark cream...maybe a sand color, for the middle.  Here's a close up...
Inspiration is everywhere...thanks ELF!!  Thanks for visiting me today!! Hugs!! Lisa

Saturday, October 1, 2016

Birch Trees for World Card Making Day!

Happy October and happy World Card Making Day!!  What a fun excuse to sit down and create a card today...how about you??  I thought the new Simon Says Stamp Birch Tree Window die was so pretty in the Stamptember® release...I just HAD to have it!  I have made a Fall card with it today...
 I die cut and layered the window die cut, then colored the top tree and some of the leaves, adding a sky blue background.  Added the sentiment from another of the new Simon stamp sets, Hydrangea Blooms.  Here's a close up...
I love that card making, like so many hundreds of other wonderful things in my life, has a day to celebrate it!!  Thanks for visiting me today!! Hugs!! Lisa