Tuesday, July 9, 2013

Thank Yous...One with Feeling, the Other Classic

Ok...a tiny story.  My husband went to lunch with a friend at the Cheesecake Factory...a great restaurant, most FAMOUS for their delicious cheesecakes.  I have never been there, but have had the White Chocolate Raspberry Truffle cheesecake...

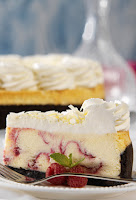
 and LOVE, LOVE, LOVED it!!!  My husband wanted to bring a piece home for me after their lunch, when his friend proceeded to buy an entire small cheesecake for me!! I sent him a thank you note...our whole family loved it!!  THEN...they went there for lunch yet again a couple weeks ago.  This time, his friend bought the WHOLE, LARGE  White Chocolate Raspberry Truffle Cheesecake for our family!!!  OH MY GOODNESS...I was shocked, but have to tell you, I have been in heaven!!!  Our son Noah is LOVING it as much if not more than me, so to say we are thankful for this second, HUGE cheesecake is an understatement!! I had just lost 12 lbs with 20 more to go, so a bunch of slices went into the freezer for later...much later..but loving it:)!!
 I made this first card, expressing all my feelings with talk bubbles.  My daughter thought the bubbles were too much and my husband didn't understand it...but I've decided to show all of you, anyway, then the one I decided to send him...
I used the talk bubble dies from Lawn Fawn and sentiments from Paper Smooches, layered and popped up...I just thought it was cute, funny and expressed all my feelings.  But, I decided to go a bit more subdued and classic with some Papertrey Ink Square Prints stamps and a Hero Arts sentiment inspired by the Less is More challenge this week having shades of gray( I stamped light gray paper with Stampin Up gray ink)...
I'll just put all my feelings on the inside:)!!!   Thanks for visiting me today!! Hugs!! Lisa

Monday, July 8, 2013

Violas

The dies from the Summer Collection at Simon Says Stamp are amazing and plentiful!! I used the Viola Sprouts die and the Flower Friend stamp set and made three cards...
 I die cut each set of viola sprouts using glossy paper and sponged the flowers and stems with ink using small daubers.  I masked the stems while sponging the flowers and then masked the flowers while sponging the stems.  I discovered, the hard way, that not masking, no matter how careful, looks like this...green on the yellow flower, and purple on a leaf:(...

All three cards are simple...white cards with a white panel....LOVED that I found a sentiment perfect for each layout from the SAME SET!!...I used Stampin Up Summer Sun for the yellow and Old Olive for the stems.

This second one, I used two different colors of purple and sponged the center cut outs and put them back in the flowers ...

The third one looks a bit washed out compared to the first two, but IRL it just looks pretty and light...
I googled violas and tried to make my violas similar to the real thing...well minus the middles on the first and last.  LOVED making cards with this flower die...hey, three in one day...all this morning!!!  LOVE that too!!!   Thanks for visiting me today!! Hugs!! Lisa

Sunday, July 7, 2013

LIM 127...Shades of Grey

The challenge this week at Less Is More is to make a clean and simple card using shades of grey(gray)...how very intriguing!!  I opted for a cute set of stamps and matching dies I recently got from Papertrey Ink, Little Bitty Bird....yes, an old set, but very new to me...birds, grey, ...it just works...
I stamped the bird stamps on a white panel, standing on top of one another atop a "ground" piece(A Muse Studio Ovalicious).  Then I stamped and die cut the birds in the different shades of grey....yes stamped THEN die cut.  I got tired of trying to line up the stamp with the die cut image...they always stamped a bit off.  SO...I die cut  the birds each with a thin piece of paper, and after stamping and clear embossing a bird, I placed the thin paper bird OVER the stamped image, put a tiny piece of Elliptical tape on the very top edge of the paper bird, and then placed the die OVER the thin paper and die cut the bird...PERFECT every time!!  Hope that makes sense!  I stamped more birds, to have gray wings for each bird, rotating the gray colors.  Die cut a rectangle, stamped the sentiment and popped up on gray panel.
Thanks for visiting me today!! Hugs!! Lisa

Saturday, July 6, 2013

Love You

Another Avery Elle sentiment from Oh Happy Day....this one uses the arrow like the last, but also the two tiny birds from the set, too...
I cut a panel and then a scrap panel of the same size.  I die cut a heart with the  Simon Says stamp heart die, in the position I wanted on the scrap panel, and then placed the scrap panel over the card panel.  I sponged some Pale Tomato through the die cut heart, removed the scrap piece and then stamped the arrow, birds and sentiment.  Thanks for visiting me today!! Hugs!! Lisa

Oh Shoot!

I LOVE the sentiments in the new set from Avery Elle's Oh Happy Day set!!  I especially love the "Oh shoot" sentiment, as that is one expression I use frequently:):)!!...I immediately saw the arrow and thought of a target...
Cut some circles with my Spellbinder circle dies and added silver and colored white paper for the arrow...super simple, but SUPER fun!!  I have 2 others I made using the same set...will see if I can get some better light to take some pics before the day is out:)....thanks for visiting me today!! Hugs!! Lisa

Thursday, July 4, 2013

Summer Card Camp 2 Sketch

Happy 4th of July for those of you here in the states:)!!
I love taking the online card classes!  I LOVE to glean from the masters!!  Sometimes, even though classes are a week or more long, I may take away just a few key things or ideas.  BUT that's a few more things that hopefully make me better at this amazing craft that I LOVE so much!!  I always want to keep getting better!!  The Summer Card Camp 2 is about to begin, and the participants have been given a pre-class sketch.  I could not copy the sketch, so I guess you will have to join the class to get it, but my card is a kind of different take on it...can't get away from the hexagons:)...
 I  used a Spellbinder rectangular die and cut a black rectangle and cut a rectangle out of the card panel. I placed the black rectangle inside the card panel and using Simon Says Stamp Hexagon dies, I cut three different sized apertures out of the panel.  I die cut the smaller hexagons with Papertrey Ink 
Bitty dotted papers(providing a link here, could not get PTI to create link below)(the green one I had to cut down by hand, cutting opposite sides after each other, cutting all sides the same amount...easy) and then stamped the colored hexagons with an old Stampin Up set called Pocket Silhouettes.  Popped up panel and colored hexagons on white card(the white and black paper are Bazzill.  The sentiment is from Simon Says Stamp Tilted Banner Sayings!  Here's a close up...
Can't wait for classes to start!!  Thanks for visiting me today!! Hugs!! Lisa

Wednesday, July 3, 2013

Berkshire Leaves 3

I decided to try a variation of the last Berkshire Leaves card... this one horizontal and colorful (you know me and rainbows:)!!)...
I die cut the Berkshire Leaf background die twice and cut out colored paper with one of them, adhered the colored leaves to the second die cut leaves. I adhered the Outline die the same way as the last card, and adhered the colored pieced leaf die to the outline.   The dies and sentiment are Simon Says Stamp...the sentiment is a cut apart long sentiment from Handwritten Sentiments.  Thanks for visiting me today!! Hugs!! Lisa

Tuesday, July 2, 2013

Flowers Meet Hexagons

Brought hexagons and flowers together with a Simon Says Stamp die and flower stamp!...
 I stamped, clear embossed, cut and colored the flowers with markers.  I used Doodlebug brads for the centers.  I die cut the middle size hexagon from the set of three Simon Says Stamp Hexagons Dies down the middle of the panel three times.  I used a Simon Says Stamp sentiment from Tilted Banner Sayings and stamped the sentiment on the bottom and clear embossed.

I die cut some copy paper, flipped the panel over, adhered the copy paper die cuts in position up and down both sides of the apertures.  I placed the die over each of the copy paper die cut papers and with my Spellbinder embossing pads, embossed 4 hexagons on each side.  I popped up the panel on a card.  Here is a close up showing the flowers, embossing and popped up panel...

Can't help saying it...FUN!!  Thanks for visiting me today!! Hugs!! Lisa