Saturday, February 28, 2015

Happy Easter Chickie

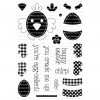
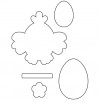
I thought the little chickie in the new Clearly Besotted stamp set, In Stitches Easter, was adorable....
I WILL say, though, you must have either a great eye or, as in my case, a stamp-a-ma-jig, for positioning!  Each one of the wings, the feet, the tuft on the head, and the beak are all individually stamped...and after a WHOLE bunch of failed attempts, I finally got smart and got out my stamp-a-ma-jig!!  SO MUCH EASIER with a much better result...lining up the chickie's parts THEN stamping...but ...that IS five separate stamps and five times lining it up!!  I have 2 more I made when I finally figured out how to make this little cutie, which I will definitely be making something with.  HAD to have little google eyes:)!!  So....he might look a little bare, but I was thinking white...egg...purity...Easter...and I was just too pooped from all my stamping that I thought it enough to put my little cutie a solo on this card:)!!  Thanks for visiting me today!! Hugs!! Lisa

Tuesday, February 24, 2015

Happy Birthday...Sour Apple Rocks!!

Oh my...I am LOVING the sour apple Bazzill paper I got from Michael's...this color is so cool!
This is how this card went down...leftover flower that I had when I last explained how to make these flowers (it got LOST in my white scraps and just found it last night, EXACTLY one month later(does that tell you how many white scraps I have???!!!!)...and the badge in the middle of the flower was from a package of badges I received as a gift from my amazing son-in-law, Nic, who thought of me when he was out shopping at a TJ Maxx while he was here a while ago!! Simply made, but SO MUCH FUN!!!!  Thanks for visiting me today!! Hugs!! Lisa
Monday, February 23, 2015

CAS(E) this Sketch 111...Thinking of You

I LOVE sketches...and the CAS(E) this Sketch sketch for this week is no exception!  The only thing is...being a very visual interpreter, I have to confess....ovals are tough for me!  Now I know, I could substitute squares or rectangles for that oval, but being VISUAL...I couldn't escape the oval...so I flipped the sketch and did some stamping off (I think they also call it second generation:)!).  Here's my card and the sketch...


Pretty simple card...LOVE the Beanstalk Green ink from Simon Says Stamp...what a perfect green for this technique!!  I used Spellbinders Petite Ovals which I could not find, but wanted to let you know what I used for my oval die cuts, layered and nested:)!  Thanks for visiting me today!! Hugs!! Lisa
EDITED***  Thank you, ladies, at CAS(E) this Sketch!...My card was given an honorable mention this week...what fun!!

Sunday, February 22, 2015

Mod Flowers

 Along with the Ashby corner die from the cards I made yesterday, I also purchased the Mod Flower Border die and made a "Mod" card...am LOVING these Poppy dies!!...

This is what it looks like closed:
Layered the flower border twice...put black semi die cut border behind (did not cut it with metal plate, so it served as a background as well as a support for the white border), and then attached the green/white/black panels (all adhered together) onto the white card.Thanks for visiting me today!! Hugs!! Lisa
****EDITED****
I had numerous questions about what I meant by semi cut.  To help answer all those questions, I have a couple pics...
 For dies like this one, I always use my metal adaptor plate for all the fine details.  Wanting to semi-cut, for me, means not using the plate, which will not FULLY cut the flower images, and give me the ability to layer this piece behind my white, layered images.  The first pic I have run through my Big shot.  It has cut the flowers, but not cut the details enough for the pieces to fall out.  The second pic shows the edges removed from the die cut...one piece, a little more than 1/2 way down, I had to use scissors to cut the edge from the border's flowers...
I then used glossy accents on the BACK of THE WHITE layered piece and adhered black piece to the white, so there is not lots of glue all over the black flowers(because this will show through).  Hope this makes sense and helps a bit...sorry it has taken me so long to get this to you!! 

Saturday, February 21, 2015

Corner Dies Go Center Stage

I recently got the Poppy Stamps Ashby Corner die...loved the look of the lacey flowers!!  It is exactly what it's name says...a corner die, but I decided to use two layered corners together and bring these corners to the center of the card...
 AFTER I made this card, I decided it would have been cool to show you how I did this, so I made a second card:) (No videos yet...but I'm still working on it!)!  I used three corners, layering ...
 to make my two corners...
Then, having a colored piece of card stock, place the two layered corners on the card stock...
position, bringing them together, and adhere to the card stock (Oh, I cut off the corners that are sticking out, but don't have a picture showing that)...
I loved that MFT sentiment I used on the blue card so much, I used it on this coral card too...
Thanks for visiting me today!! Hugs!! Lisa

Friday, February 20, 2015

Jumbled Birthday

I recently got the Jumbled Happy Birthday die by Poppy Stamps...love the font of these jumbled dies!!  I DID cut the die apart with my metal snippers, as the angle I chose to create this card with did not afford die cutting the happy birthday  as it was created...
I die cut the stitched stripes and adhered them to a 4 1/4" x 5 1/2" piece of printing paper(super thin paper), so I would be able to easily die cut the words from the striped card stock.  I layered the words twice UNDERNEATH the die cut letters for that depth that I so love,  and adhered the panel to a white card.  The colors of the cardstock are Black and Stampin Up Bermuda Bay.  Thanks for visiting me today!! Hugs!! Lisa


Simon's Spring Hop to It!...Artful Flowers

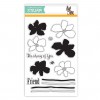
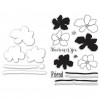
Today over at Simon Says Stamp,  a brand new Spring Release is being revealed...Hop To It!  I have made a couple cards with a beautiful set of floral stamps, Artful Flowers, and their coordinating dies, Designer Flowers...just one set from this wonderful new release!!...
 This first one, I stamped the outined flowers in black, clear embossed, and colored with my spectrum markers.  I cut them out with the coordinating dies, layered once and adhered them onto a card that I had stamped with a striped background stamp and Simon's Maliblue ink(LOVE this blue...so pretty!!).

This second card, I stamped on vellum with versamark, and white embossed.  I colored with my sharpie  and mark it markers on the back/opposite side of the stamped flowers, then popped up card panels on either side of the panel after adhering it to the card. Ok...LOVE...these flowers are not only so pretty, but so versatile!!  Hope you will check out the new release on  the Simon Says Stamp site...Happy Spring:)!!   Thanks for visiting me today!! Hugs!! Lisa