Wednesday, July 30, 2014

Basket Full of Sunshine

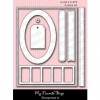
I got a piece of the My Favorite Things Blueprints #2 out, today...and fiddled around with it and out of my fiddling, this evolved...

The piece I used is at the bottom with the red arrow pointing to it...
I thought to weave through the rectangles...my first thought was a manly card, but the woven brown Tim Holtz textured paper turned into a basket.  THEN...what to put in the basket??  I thought flowers, hearts, but remembered a Hero Arts "basket" sentiment that, together with a Simon Says Stamp "sunshine" die, went perfectly with 3 die cut suns.  So funny...
Hero Arts: sentiment
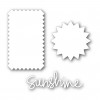
Simon Says Stamp: sentiment die
My Favorite Things: die for basket
Lil Inker Designs: large and small suns
Lawn Fawn: the largest sun
6 elements...5 companies...a little cray cray...but cool at the same time
I layered all the suns, the die cut sentiment, and added some paper to the back of the basket for not so much dimension as heft for a strong basket.  Thanks for visiting me today!! Hugs!! Lisa

Monday, July 28, 2014

The Stitched Look...Happy!

I LOVE the stitched look!!  I just got the My Favorite Things Blueprints #2...has a stitched long strip and a couple stitched sentiment banners....I just HAD to make a card...made two...
 I used a Crafty Cutts die for the "Happy", a Simon Says Stamp stamp for the "hello"...LOVE the stitched strips!!...
For the second card, I used the die cut "Happy".  I chose a background stamp for this card to accent the die cut sentiment...
 I used the "birthday" from the background stamp to finish the "Happy" sentiment.  I decided to tape off the one word and then versamarked, stamped and white embossed the single word onto the card.  I used my T ruler as a big stamp-a-ma-jig and placed the bottom and side of the card base against the rulers both when I stamped the single word, and then again when I stamped the whole background in versa mark, after stamping the single word.
Here's a close up of this one...
Oh what fun!!  Thanks for visiting me today!! Hugs!! Lisa

Saturday, July 26, 2014

The Cutting Edge Challenge #5... Love You


It's time to share the next Cutting Edge Challenge!  We have another beautiful inspiration project, this one done by Melania Deasy!   I can’t wait for you all to play along, so let’s get to it, shall we?!
  Let yourself be inspired by Melania's card, and create a card that includes die cutting (all forms accepted).  There’s so much about this project to be inspired by, right?!  Here’s what I created:
I told the team when I made this card...I loved Melania's card so much, my mind and creativity just wanted to recreate!!  I DID change the sentiment, the flowers to hearts, but the elements and colors are pretty similar...you can be inspired by one thing, many things, and sometimes everything, right?!!  I did search out Melania's blog to find this card, wanting to know where she got that amazing "Love" sentiment, only to find it was done on her Silhouette...bummer...I don't own a Silhouette.  I thought outside the box, and used an alphabet die set from Papertrey Ink to make MY "Love".  I die cut the letters in thin card stock and adhered to the card when I was ready to die cut each letter, putting them VERY close together, so they all die cut touching, like Melania's.  I stamped the polka dots onto cardstock and die cut the hearts.  The "you" is from a Simon Says Stamp sentiment and the little dots are from a new Simon set, Floral Bookmarking.  Ok...so much fun!!

We’d love to have you play along with us! If you click on through to The Cutting Edge Challenge Blog, you’ll find lots of information, including:
  • The Winner of the last challenge, as well as the Top 3, are being announced;
  • The first half of the The Cutting Edge Design Team is sharing their samples for the challenge, and they are pretty fabulous;
  • The rules and regulations of the Challenge are listed; and
  • The InLinkz link-up tool for you to link up YOUR project!

The challenge closes on Thursday, July 31, 2014 at 9:00 AM EDT, so what are you waiting for?!  You can find everything you need to play along HERE.  We can’t wait to see what you create!!
Thanks for visiting me today!! Hugs!! Lisa
Wednesday, July 23, 2014

A Card from Reused Container

I was a design team member with Splitcoaststamper's Dirty Dozen from Jan-June.  I made 6 cards a month for the team, and had lots of fun with the monthly themes!  After 6 months from first being shown on the SCS site, I am allowed to show them on my blog.  I will show you my favorite(or two) from each month.  This card is from January, the theme was dirty deeds done dirt cheap!  My family was sick, so we ordered Panera's Chicken Noodle Soup in LARGE quantities!!  I make my own chicken noodle soup, but the soup from Panera Bread is yummy...and seems to really make you feel better!...and I was sick, too, so...it's nice having someone else make it for you!  I used the carrying case the soup came in and made this card...The carrier was red on the outside, cardboard colored on the inside with print on the sides(which I used for the middles of the flowers)...


I used my favorite flower dies from MFT for the flowers, the leaves and the flower's  centers were made with dies from another MFT set.  I cut the stems with my cutting board.  I tried to cut the centers with words of "sweet" things in them, to go with the Hero Arts sentiment from the FRIENDS set(the link is to ebay...I think this set is retired, but there are a bunch available on ebay if you are interested:)!!)...
So fun using things you have on hand to make cards...great for your pocket book, for getting your creative juices going and great for the environment:)!!  Thanks for visiting me today!! Hugs!! Lisa
Tuesday, July 22, 2014

Thank You Background Die Three Ways

I LOVE the background dies from Memory Box!!  I have the Birthday one, and recently purchased the Thank You AND Christmas dies...I now own three of these wonderful dies!!  They have SO MANY possibilities for making cards!!  I have three cards to show you that I made using the Thank You die, using just one of the Thanks sentiments from the die's many Thanks and Thank Yous die cut sentiments...
 I die cut this THANKS in 5 different colors and adhered the different colored letters into the layered full card Thanks die cut.  I added a sentiment from Paper Smooches.

Then...I used the same THANKS colored letters, simply changing the white background to black...
I used textured paper for the die cut letters.  Here's a closeup...

For the third card, I used the white die cut letters from the first two, layering each of the letters twice and then layered on top with one of the colored letters...
I used an Impression Obsession Cover a card thin stripes stamp with versamark and embossed with clear embossing powder after putting a thick and thin piece of eclipse tape where the "THANKS" is, to keep from embossing that space, and a couple scored lines on either side of the sentiment, the "for everything" is from the Many Thanks Paper Smooches set(LOVE THIS SET of thank you stamps!!).  Here's a close up of the embossing and scoring...
FUN, FUN, FUN!!!  Thanks for visiting me today!! Hugs!! Lisa

Monday, July 21, 2014

Fall Leaves with Vellum

It may be a bit early for Fall, but I just got a  new die from Memory Box, Leaf Silhouette...when I saw it, I just had to use it...
 I had gotten some new colored vellum from Paper and More a bit ago, and I thought it perfect for this die cut.  I die cut the silhouettes in each of 3 colors and after layering the die cut leaves border, I filled them in with the colored vellum leaves.  I placed the lighter vellum on top of the darker, it's easier to see the change of color that way:)!!  Here's a close up...
I used a papertrey ink woodgrain impression plate and a sentiment from Paper Smooches...I LOVE this sentiment stamp set...one of my most used and favorite stamp sets for thank you cards:)!!  I will be using this die again, soon:)!!  Thanks for visiting me today!! Hugs!! Lisa