Pages

Sunday, March 29, 2015

Unforgettable

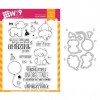
I LOVE the elephants in the new WPlus9 stamp sets!!  They are adorable!!  Only thing is, I think they look cutest colored, and I AIN'T a colorer!!  I tried my best...I DO think coloring and shading takes practice and some knowledge, neither one of which I have, but I gave it my best shot!!  These elephants are so cute, perfection in coloring isn't really needed, they would look cute cut out of grey paper, or with polka dots...This card was made with the Unforgettable set...
Stamped, die cut, colored and layered both the little guy and balloon.  Adhered to panel, and popped up on card.   Drew the white line on balloon with white gel pen.  Thanks for visiting me today!! Hugs!! Lisa

Saturday, March 28, 2015

CAS(E) this Sketch 116...Get Well Wishes

The sketch at CAS(E) this Sketch is simply simple...I opted to make my center square a bit bigger than the sketch, but kept it pretty simple...
Here's the sketch...
I used my leaves as the outside-the-box element, the butterfly being a part of the leaves.  The butterfly was stamped on vellum, colored on the back, and glue dotted to another die cut butterfly so the color on the vellum was not lost.  Here's another pic, kind of showing the layered butterfly...
Thanks for visiting me today!! Hugs!! Lisa

Monday, March 23, 2015

Copper, Silver, and Gold Birthday

I have been wiped out with a respiratory "thing" since Friday...feeling good enough to make a card this morning!  Quick, easy, fun...
Used my versa mark, static bag and three metallic embossing powders with the stamps from MFT ...great "manly" card.Thanks for visiting me today!! Hugs!! Lisa

Saturday, March 21, 2015

Spring Fling Quick Card Panel Cards

I know I've said it before, but will say it again, I LOVE the new Reverse Confetti Spring Fling Quick Card Panels ( I ordered a whole bunch when they came out)!!  They are SO much fun to create with...easy, fun, quick, and ultimately cool cards can be made with these papers!!  I made a couple cards with the panels and the Sun 'n Clouds Confetti Cuts dies also by Reverse Confetti...
The hearts were die cut from a Reverse Confetti heart die listed below, the "wishing you well" is from Petals 'n Posies.  
I embossed the sun die into the white card for the background, and glossy accented the hearts on both cards.  


Thanks for visiting me today!! Hugs!! Lisa

Friday, March 20, 2015

Happy Spring!

I discovered that it is the first day of Spring, today!!  I COULD NOT let the day go by without acknowledging this special day!!  I have daffodils blooming in my yard, with tulips and gerberas on the way...used a new Spring Fling Quick Card Panel from Reverse Confetti that was PERFECT for a fun, by it's very name...quick, Spring card...
 
These quick panel cards are some of my favorite things...I LOVE how easy it is to be inspired and easy it is to make cards with these colorful, fun papers!!  The flowers are also Reverse Confetti...Petals 'n Posies, the stems and leaves are My Favorite Things, and the striped background is Papertrey Ink Simple Stripes Impression plate(which is no longer available)...so sorry...I cannot seem to provide links to Reverse Confetti through Inklinkz...but direct links can be made by clicking on the green print:)!!Thanks for visiting me today!! Hugs!! Lisa

Yesterday's Leftovers!

Took the leftovers from the card I made and showed you how to make, yesterday...
I used the first cuts from my chevrons from yesterday to make this first card.  Yes, I added a purple strip on the first one...had to have one more color so that the ends were flat.  The "GET WELL WISHES" is from Papertrey Ink.  Popped up the white panel...

This second card is simply the finished product from my "how to" pictures from yesterday. 
 I added a "thanks" right onto the chevrons instead of below...it fit and I thought it looked cool:)!  The "thanks" is cut from a paint chip (so no glossy accents) and layered with 2 layers of black card stock for depth...
Thanks for visiting me today!! Hugs!! Lisa

Thursday, March 19, 2015

Rainbow Strips Hello

Last night I had a thought to use the Pretty Pink Posh Stitched Border dies I had purchased a while ago, but haven't had time to play with, so that's the set of dies I immediately pulled out this morning and made this...
I layered and glossy accented the "hello", and popped up the white panel from the colored strips..
No...no stamping or ink on this one, but FUN, FUN, FUN!!!  Thanks for visiting me today!! Hugs!! Lisa
EDITED TO ADD HOW TO
OK...hold on...here are some pics for you...putting this card together was fun, but involved particulars to making all the uneven edges fit together and fit the card, so here's some of MY tips (although you might be able to do it easier...please let ME know if you do:)!!)...Hopefully this will help answer some of your "How did she do that" questions:):)!!...
      
Cut the end off of colored paper with the tiny chevron die, then line the die up against that cut edge, making sure the stitch edge is on the already cut side and the cutting edge of the die where the tape is showing.  Die cut all the rest of the colored strips.
 
Put adhesive on piece of paper(I used thin card stock) and place all the stitched strips on top of it.  Cut underneath the blue and pink edges, so no sticky edges...hey, no edges at all:)...yes, you could put less adhesive and leave the paper...just showing you how I did it:)...

Using a 4 1/4 x 5 1/2 piece of white cardstock to make your top panel, make stitched cuts on both sides of panels in a slanted direction.  With ANOTHER 4 1/4 x 5 1/2 piece of paper(can be a junk paper as long as the measurements are right), adjust the three pieces together on that paper, so they kind of fit the white paper underneath (yes, they will be way too long).    Place a tiny swipe of adhesive to the back of each of the three pieces, while making sure they are where you want them on the piece of paper.    The next pics were taken on scoring board, cutting board, and die cutting machine...on my lap or edge of desk...so just look at the card, not the background...:)LOL...

 REMOVE the colored strips, then turn over.  It should look kind of like the middle pic...uneven edges on every side.  You need to cut the edges off...you can cut them all off by hand, I cut one with scissors, then having one straight edge, cut the other 3 edges with my cutting board.  THEN trim off  1/4 " from each side.

 
Remove the white halves from the scrap piece of paper, put pop up dots on back, then adhere the strip and the panels on top and bottom of it...done...well with addition of "Hello".  Hope it all makes sense...