Pages

Thursday, October 31, 2013

Sequins

A few weeks ago, my daughter and I made some Christmas ornaments like we made when she and my other children were little.  I have been seeing sequins on cards, of late, and I love sequins, but I have to say, this trend eludes me...not exactly sure why, but not seeing sequins as embellishments.  You may love sequins on cards and that's great, but I decided to use my "lot" of potential sequins I would use on cards, and pin them to a styrofoam ball with some sequin pins:):)...
We threaded some silver ribbon through the ball and then pinned away.  My daughter pinned her sequins with the curved side "in" and I chose pinning my with the curved side "out".  Ok...that's all I'll say about or you'll see of sequins:)!!  Thanks for visiting me today!! Hugs!! Lisa

Wednesday, October 30, 2013

The Adventure Begins

I purchased a Kelly Purkey die from Simon Says Stamp after I saw Laura Bassen use this die on a card, suggesting that it would be a great die (the cool sentiment) to use for wedding cards, and I thought that sounded like a great idea...who doesn't need ideas for wedding cards?  I put it away, but just had a different use for this sentiment die today.  My daughter Emma just got her very first full time job a couple days ago, and will start next Monday...I am so stinkin' proud of her, and thought these words PERFECT for a card to give her on her first day starting her new job!!...as with all new "things" in life, it WILL be the beginning of an adventure!!...Super simple, but fun!!!...

Die cut twice and adhered so the white panel is two layers thick...LOVE depth.  The die cuts the exact size you see on the card...sweet!!  Added strips of colored paper behind the letters and adhered the middles of the letters(perhaps the hardest part...patience with tiny pieces:):)!!).  Here's a close up...
Thanks for visiting me today!! Hugs!! Lisa

Monday, October 28, 2013

Christmas in Pink

I had the Holly Jolly die set from Lil'Inker Designs on my desk from a card made a couple days ago, and decided to make another card...super simple with lots of color possibilities, depending on your patterned paper...I decided to go pink!  I cut apart the die and used the negative space to make this...
I cut the base of the tree from the tree with my all purpose snippers...

Then I die cut the tree on my white card panel, and after that, die cut the base on top of the already cut tree...overlapping a bit.  I stamped the sentiment and decided that a pink bow was in order.  Thought of twine, floss, even tried other colored ribbon...but chose pink,...I think pink works:)!!  The paper is My Mind's Eye that I got at Michael's, Merry Little Christmas!  Thanks for visiting me today!! Hugs!! Lisa

Sunday, October 27, 2013

Sending you a little "Hog"

The quickest post ever!!  this is for CASology 67...the cue word COUNTRY!
When I thought of country, I thought of farms and animals...so...a pig it is for me!  Put him in an envelope and that's it:)!!  Thanks for visiting me today!! Hugs!! Lisa

Twined Tree

The challenge at Less is More this week, has me trying new things with twine!   I decided to use it when die cutting and made a christmas tree with some stripes of twine...

                                                     Here's a close up of the die cut tree...

                 And here's proof...cause I know it doesn't really LOOK like twine in that tree...
Layered tree and sentiment, used glossy accents(very sparingly and carefully) to attach the landscape twine to the card and popped up tree and white panel.  We'll see if I can think of more ways to use twine:)!!  Thanks for visiting me today!! Hugs!! Lisa

Saturday, October 26, 2013

LIM 143..Snowflakes with Twine

The challenge this week at Less is More is to use twine or string on your clean and simple card.  I know my use is small, but the idea I had was to use twine to tie my snowflakes to my card...
I used a border die from Simon Says Stamp, a snowflake die from W Plus 9 Design and "SNOW" die from Papertrey Ink.  I punched a hole in the centers of the snowflakes and used twine to knot on the tops of the flakes through the circle holes and knotted on bottoms.  Here's a close up...
EDITED****Forgot to say and answering Lisa's question...I layered the flakes and "SNOW" each 3 times for thickness, dimension...LOVE the look of layered! I layer until I like how it looks (usually 3 times)!!   I punched the hole in the snowflakes with each layer...not all at once.  Just wanted you to know:)!!  FUN!!  Thanks for visiting me today!! Hugs!! Lisa

Friday, October 25, 2013

Christmas Tags Round 1

I don't know what exactly possessed me, but I went on a Christmas tag binge!!  My daughter in Nashville loves tags for her presents, and seeing as a challenge at CAS-ual Fridays last year was my first attempt at making tags, I thought I'd start early and make lots:)!!  Like Noah's Ark, there are two of every kind(I'm only showing you two...I made a bunch of each:)!!)...most of them you will be able to figure out how to make...some things I'll explain.  I made them easy and fast, reading comments last year that tags are thrown away, so not to spend too much time on them, but wanted something that didn't LOOK like it only took a couple minutes to make:)!!...Here they are...

 I used the Simon Says Stamp Medium Tags for all these tags.  These first ones, I made longer by letting the die go part way through my Big Shot, then turning the paper around and extending the space, then taking it part way through the other side of the die.  The stripes were made using the striped stamp from the Simon Says Stamp Tag Sayings stamp set.  The middle circles are from SSS Circles for the Holidays.
 I was definitely in a "love" mode....as you will see!  The same striped stamp and the LOVE stamp from the same set in Christmas colors.  I die cut the hearts from SSS Large Holiday Shapes die, and I coated the hearts with glossy accents.

 I adhered ribbon to a piece of paper and die cut a bunch of christmas trees with the SSS Suspension Tree die.  I used the SSS Falling Snow stencil with Embossing Paste on a couple pieces of paper, let dry, and then die cut all the tags at one time.

 SSS Maryanne snowflake dies with glitter on kraft.

 Used some freebie pattern paper that I got with an order, it's Bo Bunny from the Mistletoe collection.  I die cut the same trees as above, but cut out a heart (SSS Holiday Shapes) on each over the area of red on the tag, tree popped up.  Added a sentiment from SSS Handwritten Greetings in versa mark/white  or stamped in black/clear embossed.

 Used the same love  and hearts as above,  the "Christmas" sentiment from SSS Happy Meowday stamp set. The paper is My Mind's Eye purchased at Michael's.   The frames around the tags are from SSS Tag Sayings, as many of the above stamps.  Dotted the hearts with glossy accents.

Did the same as above, with the cut out hearts, but added another sentiment on glittery striped paper from Michael's

On these last two, I extended the "LOVE" tag and made it a little longer.  The stripes are made using the striped stamp from the Tag Sayings stamp set, like those above, then die cutting with Papertrey Ink letter dies. Two stamped stripes will make the 4 letters...super easy.   Love that the letters are long and thin. Encased the striped letters in a green tag.  The "JOY" is done in semi shiny gold paper, encased in red paper.

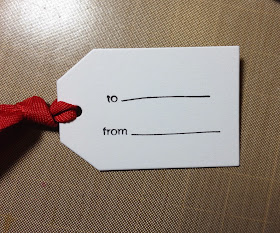
All the tags have a back on them...
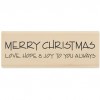
the stamps ALSO from the  SSS Tag Sayings set.  More to follow in November, I'm sure:)!!  Thanks for visiting me today!! Hugs!! Lisa